Printing a screen on your Surface Pro has never been easier if you know the right techniques. Whether you're a student, professional, or tech enthusiast, capturing screenshots is a valuable skill that can save time and streamline workflows. In this comprehensive guide, we will walk you through every step of how to print screen on your Surface Pro, ensuring you master this essential function.
Modern technology has made it simple for users to capture and share what's on their screens. The Surface Pro, with its versatility and powerful features, offers multiple ways to take screenshots. Knowing these methods can enhance productivity and make daily tasks more efficient. This article will delve into each method in detail, providing you with the tools you need to become proficient in screen printing on your Surface Pro.
Regardless of your level of expertise, this guide is tailored to provide clear instructions and valuable tips to ensure you get the most out of your device. Let's dive into the world of screenshots and discover the best techniques for your Surface Pro.
Read also:Movierulz Com Movie 2023
Table of Contents
- Overview of Surface Pro Print Screen
- Methods to Print Screen on Surface Pro
- Using Keyboard Shortcuts for Screenshots
- Utilizing the Snipping Tool
- Exploring Snip & Sketch
- Using the Game Bar for Screenshots
- Third-Party Apps for Enhanced Features
- Saving and Managing Your Screenshots
- Troubleshooting Common Issues
- Tips for Efficient Screen Printing
Overview of Surface Pro Print Screen
Why Print Screen on Surface Pro?
The Surface Pro is renowned for its hybrid design, combining the power of a laptop with the portability of a tablet. One of its many useful features is the ability to take screenshots, or "print screen," which allows users to capture images of their device's display. This functionality is essential for various purposes, such as saving important information, creating tutorials, or documenting processes.
How Does Print Screen Work?
Printing a screen on your Surface Pro involves capturing the visual content displayed on your device at a particular moment. This can be done in several ways, each offering different levels of control and customization. Understanding how these methods work will empower you to choose the one that best suits your needs.
Methods to Print Screen on Surface Pro
Keyboard Shortcuts
Keyboard shortcuts are the fastest and most efficient way to take screenshots on your Surface Pro. By combining specific keys, you can capture the entire screen, a selected area, or even a single window. These shortcuts are easy to remember and execute, making them ideal for frequent users.
Using Keyboard Shortcuts for Screenshots
Here are the most common keyboard shortcuts for printing screens on Surface Pro:
- Windows Key + Print Screen: Captures the entire screen and saves it to the "Screenshots" folder in your Pictures library.
- Windows Key + Volume Down Button: Captures the screen and saves it directly to your camera roll (useful for tablet mode).
- Alt + Print Screen: Captures the active window and places it on your clipboard for pasting into an application.
These shortcuts are designed for convenience, allowing users to quickly capture what they need without navigating through menus.
Utilizing the Snipping Tool
The Snipping Tool is a built-in application on Windows devices that provides more control over screenshot capture. With this tool, you can select specific areas of the screen, delay the capture, and even annotate the image before saving it. Here's how to use it:
Read also:Desi49 Com
- Open the Snipping Tool from the Start menu.
- Choose the type of snip you want (Free-form, Rectangular, Window, or Full-screen).
- Select the area you wish to capture and save the image to your desired location.
This method is perfect for users who need precision and additional editing options.
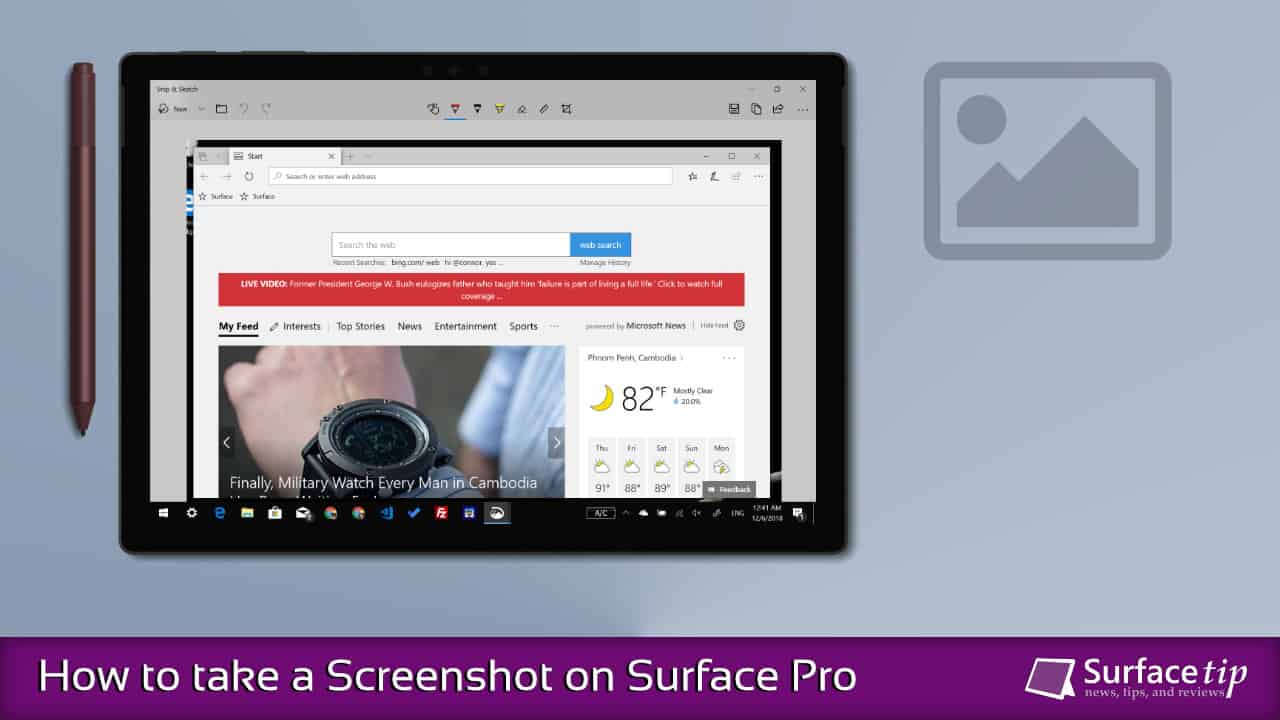
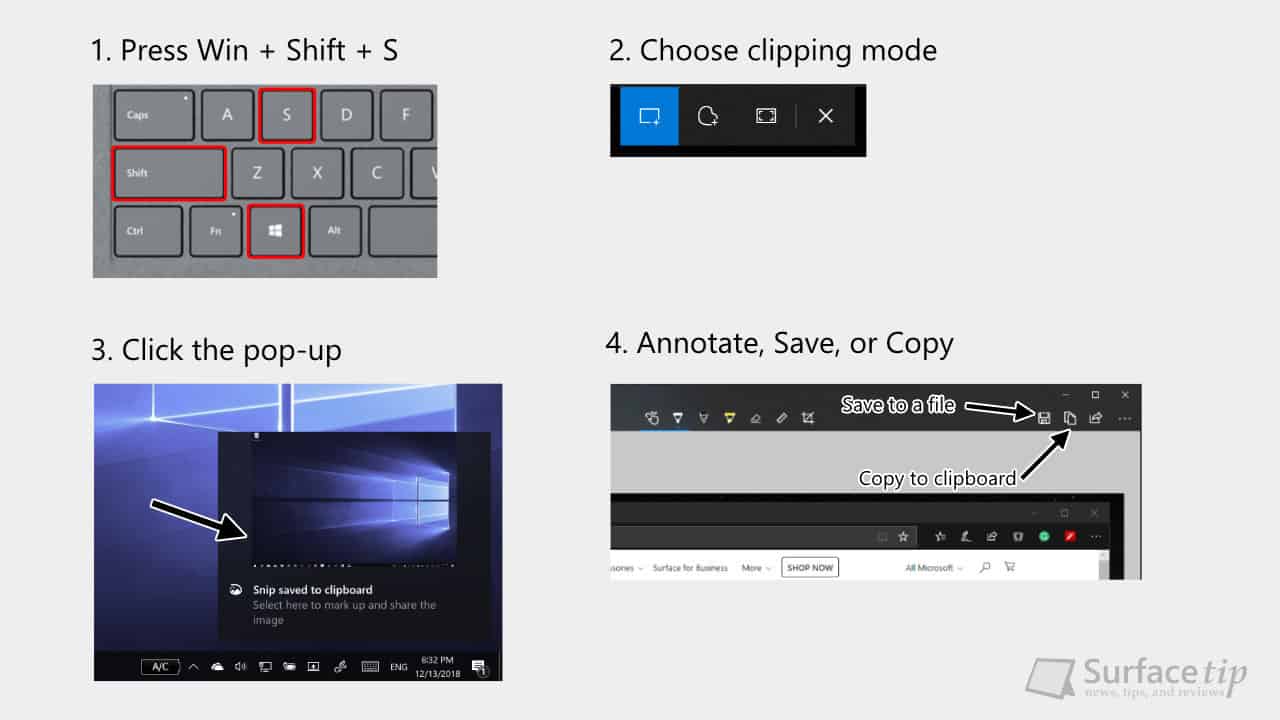
Exploring Snip & Sketch
Snip & Sketch is an updated version of the Snipping Tool, offering enhanced features and a more user-friendly interface. It allows for quick access, better annotation tools, and the ability to delay the screenshot capture. To use Snip & Sketch:
- Press the Windows Key + Shift + S to activate the tool.
- Select the type of capture you need and highlight the desired area.
- The captured image will be copied to your clipboard, ready for pasting or editing.
With Snip & Sketch, you can achieve professional-quality screenshots with ease.
Using the Game Bar for Screenshots
The Game Bar, accessible via Windows Key + G, is another built-in feature that allows for screenshot capture. Originally designed for gamers, this tool can be used by anyone to take high-quality screenshots. Here's how:
- Open the Game Bar by pressing Windows Key + G.
- Click the camera icon or press Windows Key + Alt + Print Screen to capture the screen.
- The screenshot will be saved in the "Videos > Captures" folder.
This method is particularly useful for capturing images during video playback or while running applications in full-screen mode.
Third-Party Apps for Enhanced Features
While the built-in tools are sufficient for most users, third-party apps can offer advanced features and customization options. Some popular choices include:
- Greenshot: A lightweight, open-source tool that provides extensive editing capabilities.
- Lightshot: A user-friendly app that allows for quick captures and easy sharing.
- PicPick: A comprehensive tool with advanced editing and annotation features.
These apps can be downloaded from trusted sources and integrated seamlessly with your Surface Pro.
Saving and Managing Your Screenshots
Once you've captured a screenshot, it's important to save and organize it properly. Most methods automatically save images to designated folders, such as "Pictures > Screenshots" or "Videos > Captures." However, you can also manually save and rename files for better organization. Consider creating specific folders for different projects or purposes to keep your screenshots easily accessible.
Troubleshooting Common Issues
Occasionally, users may encounter issues when trying to print screen on their Surface Pro. Here are some common problems and solutions:
- Keyboard Shortcut Not Working: Ensure that the Print Screen key is functional and not disabled by any third-party software.
- Snipping Tool Not Opening: Check if the app is installed and try restarting your device.
- Saved Screenshots Not Found: Verify the default save location and ensure that the files are not hidden.
If these solutions don't work, consult Microsoft Support for further assistance.
Tips for Efficient Screen Printing
To maximize your screen printing experience on Surface Pro, consider the following tips:
- Practice using different methods to find the one that works best for you.
- Organize your screenshots regularly to maintain a clutter-free system.
- Explore additional features in built-in and third-party apps for enhanced functionality.
By following these tips, you can streamline your workflow and make the most of your Surface Pro's screenshot capabilities.
Conclusion
In conclusion, learning how to print screen on your Surface Pro is a valuable skill that can significantly improve your productivity. From simple keyboard shortcuts to advanced tools like Snip & Sketch, there are numerous methods available to suit every user's needs. By understanding and utilizing these techniques, you can capture, save, and manage screenshots with ease.
We encourage you to try out these methods and share your experiences in the comments below. Additionally, don't forget to explore other articles on our site for more tips and tricks to enhance your tech skills. Thank you for reading, and happy screen printing!
Data Source: Microsoft Support
![How to Screen Record on Surface Pro Easily [2025]](https://recorder.easeus.com/images/en/screen-recorder/resource/how-to-screen-record-on-surface-pro.png)